Hollywood Racks offers a variety of bike racks designed for convenience and durability. These instructions guide users through assembly, installation, and maintenance, ensuring safe and secure bike transport.

Overview of Hollywood Racks Bike Rack Models
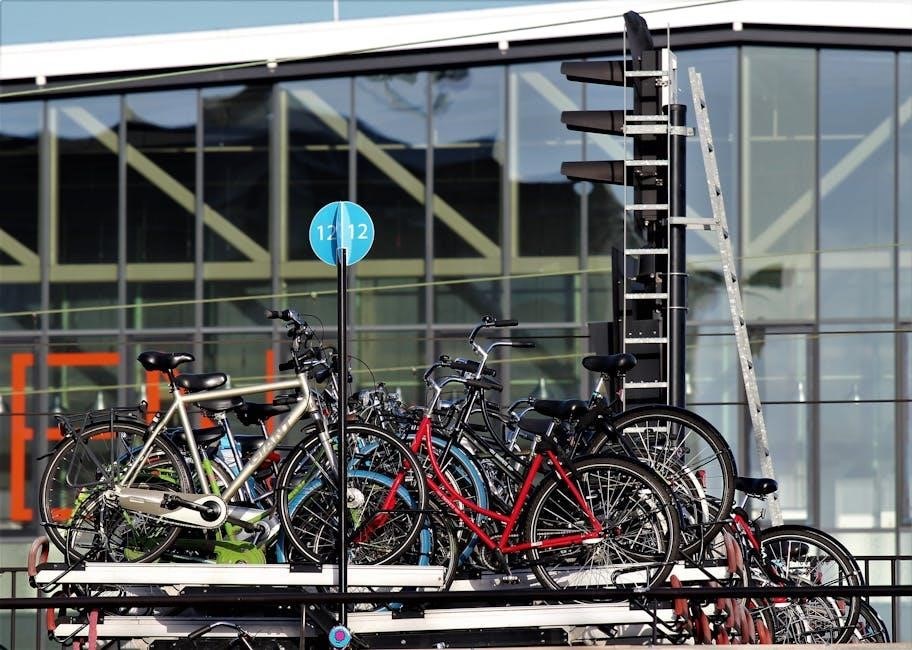
Hollywood Racks provides a diverse range of bike rack models, each designed for specific needs. The Sportrider HR1500 is ideal for e-bikes, while the HR6000 offers versatility for various bike types. The CrossTrack system features frameless touchpoints, catering to modern bike designs. Additionally, the Destination E hitch rack includes a ramp for easy loading, making it perfect for e-bikes. These models vary in capacity, from single to multiple bikes, ensuring compatibility with different vehicle setups. Whether hitch-mounted or trunk-mounted, Hollywood Racks emphasizes durability, safety, and ease of use. Their product line addresses evolving bike trends, ensuring secure transport for cyclists of all levels.
Importance of Following Assembly and Installation Instructions
Following Hollywood Racks’ assembly and installation instructions is crucial for ensuring safety, proper functionality, and longevity of the bike rack. Correct assembly prevents structural issues, while proper installation ensures secure bike transport. Ignoring instructions can lead to safety hazards, damage to bikes, or rack failure. Regular inspections of straps, clamps, and hitch alignment are also vital for maintaining stability. Users should consult the manual or contact Hollywood Racks support for any installation problems. Adhering to guidelines ensures compliance with weight capacities and vehicle compatibility, preventing potential accidents. Proper maintenance and inspections during use further enhance safety and performance, making it essential to follow all provided instructions carefully.
Hollywood Racks Sportrider HR1500 Instructions
The Sportrider HR1500 is a hitch-mounted e-bike rack with adjustable frame clamps and a loading ramp, designed for easy and secure bike transportation, ideal for heavy e-bikes.

Assembly Process for the Sportrider HR1500
Begin by unpacking and organizing all components, including the main rack, bike arms, and hardware. Attach the bike arms to the crossbar using the provided Allen wrench, ensuring they are securely tightened. Next, install the hitch adapter onto the receiver tube, making sure it is properly seated and aligned. Tighten the hitch pin and anti-wobble bolt firmly to prevent movement. Finally, attach the frame clamps and straps, adjusting them to fit your bike frames. Double-check all connections and bolts for tightness before use. Always refer to the manual for specific torque specifications and safety guidelines to ensure a stable and secure setup.
Installation Steps for Hitch-Mounted Bike Rack
Start by inserting the hitch rack’s shank into the vehicle’s receiver tube, ensuring it is fully seated. Secure it with the provided hitch pin and tighten the anti-wobble bolt to prevent movement. Check the rack’s alignment with the vehicle’s frame to ensure proper fitment. Tighten all bolts firmly, following the torque specifications in the manual. Double-check the rack’s clearance from the vehicle’s bumper and spare tire. Once installed, test the rack’s stability by gently rocking it. Ensure all straps and clamps are ready for bike attachment. Finally, consult the manual for specific vehicle compatibility and weight limits to ensure safe and proper installation.

Securing Bikes with Frame Clamps and Straps
To secure bikes, begin by placing the bike onto the rack, ensuring the frame is centered. Attach the frame clamps to the bike’s top tube, tightening them evenly to avoid damaging the frame. Use the included straps to further stabilize the bike, looping them around the wheels and securing them to the rack. Tighten all straps firmly to prevent movement during transit. For added security, ensure the clamps and straps are snug but not overly tight. Double-check that all bikes are balanced and evenly distributed on the rack. Finally, verify that the bikes are stable and cannot shift or come into contact with each other while driving;
Hollywood Racks HR6000 Instructions
The HR6000 offers a sturdy, versatile bike rack solution. It features durable construction, easy assembly, and compatibility with various bike styles. Follow the guide for proper installation, maintenance, and troubleshooting to ensure optimal performance and safety while transporting bikes.
Assembly and Use Guidelines for HR6000
The HR6000 hitch-mounted bike rack requires careful assembly to ensure proper function. Begin by attaching the mainframe to the hitch receiver using the provided bolts, ensuring a snug fit. Next, install the adjustable arms and bike cradles, securing them with the Allen wrench. Once assembled, attach the rack to your vehicle’s hitch, tightening the hitch pin securely. For use, load bikes evenly, ensuring they do not exceed the weight capacity. Use the straps and clamps to secure bikes firmly, avoiding contact with brake cables or sensitive components. Always check the hitch connection and bike stability before driving. Follow these steps to ensure safe and reliable transport of your bikes.

Regular Maintenance and Strap Inspection
Regular maintenance is crucial for ensuring the longevity and reliability of the HR6000 bike rack. Begin by inspecting all straps and clamps for signs of wear, fraying, or damage. Replace any damaged components immediately to prevent failures during use. Clean the rack periodically to remove dirt and debris, which can compromise its performance. Lubricate moving parts, such as hinges and joints, to maintain smooth operation. Check the hitch connection regularly to ensure it is secure and properly aligned. Inspect the bike cradles and arms for tightness and adjust as needed. Always perform these checks before and after extended storage to guarantee optimal functionality and safety while transporting bikes.
Troubleshooting Common Installation Issues
Common installation issues with Hollywood Racks often stem from hitch alignment or loose connections. Start by ensuring the hitch is properly secured and aligned with the rack. Check for loose bolts and tighten them as needed. If the rack wobbles, verify that the weight capacity isn’t exceeded. Inspect straps and clamps for wear; replace any damaged parts. Ensure vehicle compatibility and refer to the fit gallery for proper installation. Clean the hitch receiver regularly to remove dirt and debris that might interfere with the rack’s fit. If issues persist, consult the user manual or contact customer support for assistance. Regular maintenance can prevent many installation problems and ensure safe bike transport.
Hollywood Racks Hitch-Mounted Bike Racks
Hollywood Racks hitch-mounted bike racks offer durability and convenience for secure bike transport. Designed for easy installation, they feature rust-resistant steel and a weight capacity of up to 35 lbs per bike. Equipped with quick-release mechanisms and tilt options for easy bike access, these racks ensure a hassle-free experience for cyclists. Their sturdy construction and reliable hitch system make them a popular choice for both casual and serious riders.
Receiver Tube Clearance and Capacities
Receiver tube clearance is crucial for proper installation of Hollywood Racks hitch-mounted bike racks. The rack must fit snugly into the hitch receiver, ensuring no movement or play. Most models accommodate standard 2-inch hitch receivers, with some compatible with 1.25-inch receivers using adapters. Weight capacity varies by model, ranging from 120 to 300 pounds, depending on the number of bikes and hitch class. Always check the vehicle’s hitch rating and the rack’s specifications to ensure compatibility. Proper alignment and tightness of the hitch pin or bolt are essential to prevent wobble and ensure safe transport. Incorrect installation can compromise both bike and vehicle safety, so adherence to manufacturer guidelines is critical.
Spare Tire Clearance for Hitch Racks
Spare tire clearance is a critical factor when installing Hollywood Racks hitch-mounted bike racks, especially on vehicles with rear-mounted spare tires. Ensure there is adequate space between the spare tire and the hitch rack to avoid interference. Measure the distance from the hitch receiver to the spare tire to confirm compatibility. Some models may require a hitch extension or adapter for proper clearance. Always check the manufacturer’s specifications for minimum clearance requirements. Improper clearance can lead to damage or obstruction, compromising both the rack and the vehicle. Proper alignment and secure installation are essential to maintain safety and functionality while transporting bikes. Adhere to the guidelines to ensure a trouble-free experience.
Trailer Hitch Technical Specifications
Hollywood Racks hitch-mounted bike racks are designed to fit standard trailer hitches, typically Class III or IV. Ensure your vehicle’s hitch receiver matches the rack’s compatibility, with a minimum 2″ receiver tube size for heavier models. Weight capacity varies by rack, ranging from 120 to 300 lbs, depending on the model and hitch class. Always verify your vehicle’s hitch rating and tongue weight limit to avoid overload. Proper bolt patterns and torque specifications are crucial for secure installation. Electrical connectors may be required for lighting compatibility. Consult your vehicle’s manual for hitch specifications and ensure all components meet safety standards. Proper alignment and installation are vital for safe and reliable bike transport.
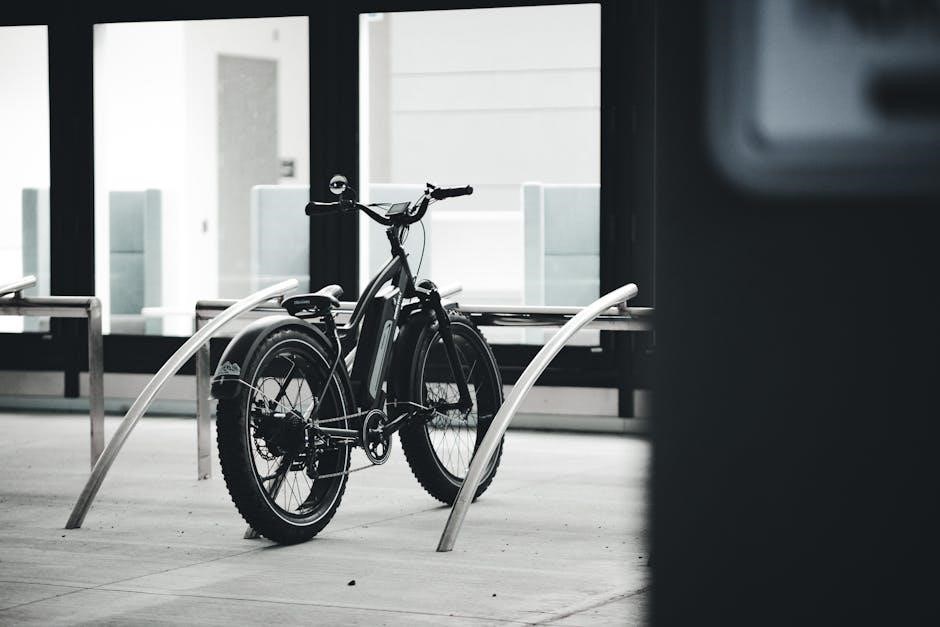
Hollywood Racks Trunk-Mounted Bike Racks
Hollywood Racks trunk-mounted bike racks offer a versatile, easy-to-install solution for carrying bikes. Designed for universal fit, they feature adjustable straps and pads for secure attachment to vehicle trunks. With sturdy frames and anti-sway cradles, they ensure bikes remain stable during transit. Weight capacities vary, accommodating 1-3 bikes depending on the model. These racks are ideal for vehicles without hitches, providing a convenient and reliable bike transport option. Regular maintenance, like checking straps and pads, ensures optimal performance and bike safety. Always adhere to weight limits and installation guidelines for a secure fit.
Fit Gallery and Vehicle Compatibility
Hollywood Racks provides a comprehensive fit gallery to ensure compatibility with various vehicle types. This resource helps users identify the correct trunk-mounted bike rack model for their specific car, SUV, or hatchback. By referencing the fit gallery, users can determine the appropriate rack based on their vehicle’s make, model, and year. Proper compatibility ensures a secure fit, preventing damage to both the vehicle and the bikes. The gallery also highlights any necessary adapters or adjustments for unique vehicle designs. Always consult the fit gallery before purchasing to confirm compatibility and ensure a proper installation. This step guarantees a safe and reliable biking experience. Regular updates to the gallery accommodate new vehicle releases, maintaining accuracy and relevance for users.
Installation Tips for Trunk Racks
Installing a Hollywood Racks trunk-mounted bike rack requires careful preparation and attention to detail. Begin by cleaning the trunk area to ensure a secure fit. Position the rack on the trunk, aligning the straps with the vehicle’s tie-down points. Tighten the straps evenly to avoid uneven pressure, ensuring the rack is stable and level. Double-check the alignment to prevent damage to the vehicle or rack. Test the rack’s stability by gently rocking it before loading bikes. Always follow the manufacturer’s torque specifications for strap tension to avoid over-tightening. Finally, ensure the rack is properly centered and secured before attaching bikes. This ensures a safe and reliable installation for transporting bikes. Regularly inspect the straps and rack for wear or damage to maintain optimal performance.
Weight Capacity and Bike Securement
Hollywood Racks trunk-mounted bike racks are designed to safely transport bikes while adhering to weight limits. Most models have a maximum weight capacity of 70-100 lbs, depending on the vehicle and rack model. Always check the recommended weight limit for your specific rack and vehicle to ensure safe transport. Secure bikes by attaching the frame clamps to the bike’s frame, avoiding contact with sensitive components like brakes or gears. Use the included straps to tighten bikes firmly to the rack, ensuring no movement during transit. Distribute the weight evenly to maintain stability and prevent damage to the rack or vehicle. Never exceed the weight capacity to avoid safety risks. Regularly inspect the rack and straps for wear to ensure reliable bike securement.

Hollywood Racks CrossTrack System
The CrossTrack System offers a versatile and durable hitch-mounted bike rack solution, featuring adjustable frame clamps and a locking mechanism for secure bike transport. Designed for various bike sizes, it ensures stability and ease of use, making it ideal for outdoor enthusiasts seeking reliable bike transportation.
Features of the CrossTrack Hitch Rack
The CrossTrack Hitch Rack is designed for durability and versatility, offering a robust platform for transporting bikes securely. It features a sturdy steel construction and is coated for corrosion resistance. The rack accommodates multiple bike sizes and styles, including e-bikes and mountain bikes. A built-in anti-sway system minimizes bike movement during transit, ensuring stability. The rack also includes integrated locking mechanisms to protect bikes from theft. Its foldable design allows for compact storage when not in use. With a weight capacity of up to 120 lbs, it can carry multiple bikes safely. These features make the CrossTrack Hitch Rack a reliable and convenient solution for cyclists of all levels.
Assembly and Installation of CrossTrack
Assembling and installing the CrossTrack Hitch Rack is straightforward when following the provided instructions. Begin by attaching the uprights to the base using the included hardware and ensuring all bolts are tightened securely. Next, install the arms and anti-sway cages, making sure they are properly aligned and fastened. For installation, attach the rack to the vehicle’s hitch receiver using the hitch pin and tighten it firmly. Use a torque wrench to ensure the correct torque specifications. Double-check all connections and test the rack by gently tugging on it to confirm stability. Finally, ensure the hitch pin is securely locked in place to prevent movement during transit. Proper installation ensures safe and reliable bike transportation.

Adjustable and Locking Frame Clamps
The CrossTrack Hitch Rack features adjustable and locking frame clamps designed for secure bike transport. These clamps accommodate various frame sizes and styles, ensuring a snug fit. To use, simply adjust the clamp width using the easy-release lever or dial, then tighten around the bike frame. The locking mechanism provides added security, preventing unauthorized removal. The clamps are durable, with a robust metal construction and rubber padding to protect bike finishes. For extra convenience, the tool-free design allows quick adjustments without needing additional tools. This feature ensures versatility, security, and ease of use, making the CrossTrack system ideal for transporting multiple bikes safely and efficiently. Proper use of these clamps ensures bikes remain stable and secure during transit.

Hollywood Racks Destination E Hitch Rack
The Destination E Hitch Rack is specifically designed for e-bikes, offering a robust platform with an included ramp for easy loading and unloading. It features sturdy construction and a high weight capacity, ensuring safe and secure transport of heavier electric bikes. The rack is compatible with most hitch sizes and includes anti-wobble technology for stability. Its sleek design and durable materials make it a reliable choice for e-bike enthusiasts. The Destination E Hitch Rack is a top-tier option for those seeking convenience, strength, and reliability in transporting their e-bikes.
Design and Features for E-Bikes
The Hollywood Racks Destination E Hitch Rack is specifically engineered to accommodate the unique needs of e-bikes. Its robust design features a heavy-duty steel frame, ensuring stability and durability for heavier electric bikes. The rack includes an integrated ramp, making it easier to load and unload e-bikes without straining. It offers a high weight capacity, securely holding bikes with up to 60 pounds each. The Destination E Hitch Rack also features adjustable frame clamps and straps to fit various e-bike styles. Its universal hitch compatibility ensures it can be mounted on most vehicles. The rack’s sleek and durable design, combined with its user-friendly features, makes it an ideal solution for transporting e-bikes safely and efficiently.
Included Ramp for Easy Loading
The Hollywood Racks Destination E Hitch Rack comes with an included ramp, designed to simplify the process of loading and unloading e-bikes. This feature is particularly useful for heavier electric bikes, which can be challenging to lift. The ramp provides a smooth, inclined surface, allowing users to roll their bikes onto the rack with minimal effort. Constructed from durable materials, the ramp is sturdy and reliable, ensuring safe and efficient loading. When not in use, the ramp folds up neatly, saving space and maintaining a clean design. This thoughtful inclusion enhances the overall convenience of the rack, making it a practical choice for e-bike owners who prioritize ease of use and efficiency.
Capacity for Multiple Bikes
The Hollywood Racks Destination E Hitch Rack is designed to accommodate multiple bikes, making it ideal for families or groups. With a robust construction, it can safely carry up to two e-bikes, each weighing up to 60 pounds, for a total combined weight capacity of 120 pounds. This ensures stability and durability, even for heavier electric bikes. The rack’s wide platform and adjustable frame clamps provide ample space for various bike sizes, while the hitch-mounted design allows for secure transport. Users are advised to check the weight capacity of their vehicle’s hitch to ensure compatibility and safe loading. This feature makes the Destination E a versatile and reliable option for transporting multiple bikes efficiently.
Safety Precautions and Maintenance
Always inspect straps, clamps, and hitch connections before use. Ensure bikes are securely fastened and the rack is properly aligned with the vehicle’s hitch. Regularly check for wear and tear, replacing damaged parts promptly. Tighten all bolts and screws to avoid wobble during transport. Follow weight capacity guidelines to prevent overloading. Clean the rack periodically to maintain functionality and durability. Refer to the manual for specific maintenance recommendations to ensure optimal performance and safety while carrying bikes.
Regular Inspection of Straps and Clamps
Regularly inspecting straps and clamps is crucial for ensuring safe and secure bike transport. Check straps for fraying, cuts, or excessive wear. Replace any damaged straps immediately to prevent failure during use. Inspect clamps for proper alignment and tightness, ensuring they hold bikes firmly without causing damage. Clean dirt or debris from clamps and straps to maintain their grip and functionality. Lubricate moving parts if necessary to prevent rust or stiffness. Before each use, test the clamps and straps by gently tugging on them to ensure they are secure. Addressing these inspections regularly helps prevent safety hazards and ensures reliable performance for your Hollywood Racks bike rack.
Ensuring Proper Hitch Alignment
Proper hitch alignment is essential for safe and stable bike transport. Before installing your Hollywood Racks bike rack, ensure the hitch receiver on your vehicle is clean and free of debris. Align the rack’s hitch pin or bolt with the receiver tube, making sure it fits snugly without forcing it. Tighten the hitch pin or bolt securely, following the manufacturer’s torque specifications. Double-check that the rack is level and centered in the hitch to prevent uneven weight distribution. If using an anti-rattle device or hitch tightener, apply it as directed to minimize movement. Finally, test the alignment by gently pulling the rack to ensure it is firmly seated and stable. Proper alignment ensures smooth operation and reduces the risk of damage or accidents.
Checking Bike Rack Stability
Ensuring your Hollywood Racks bike rack is stable is crucial for safe transport. Before each use, inspect the rack’s connection to the vehicle and the bikes. Verify that all bolts, straps, and clamps are securely tightened. Gently rock the rack from side to side and front to back to check for any movement. If movement is detected, tighten the hitch pin or bolt and ensure anti-rattle devices are properly engaged. Test the rack’s stability with the bikes loaded, making sure the weight is evenly distributed. If wobbling occurs, adjust the bike positions or tighten the frame clamps. Finally, perform a short test drive to confirm the rack remains stable at various speeds. Stability ensures safety and prevents damage to your bikes or vehicle.

Troubleshooting Common Issues
Identify the problem, check connections, and ensure all parts are secure. Tighten loose bolts, lubricate moving parts if needed, and verify proper alignment for smooth operation.
Resolving Installation Problems
Start by ensuring the rack is properly aligned with the hitch receiver. Check for loose bolts and tighten them according to the torque specifications in the manual. If the rack wobbles, verify that all connections are secure and the hitch pin is fully engaged. For trunk-mounted racks, ensure the straps are tightly cinched and evenly distributed. If the rack doesn’t fit your vehicle, consult the fit gallery or compatibility chart. Double-check the hitch size and type to match your vehicle’s specifications. If issues persist, refer to the troubleshooting guide or contact Hollywood Racks customer support for assistance. Proper installation is key to safety and performance.
Addressing Bike Rack Wobble
To resolve bike rack wobble, start by ensuring the hitch is properly secured. Tighten all bolts and check the hitch pin for a snug fit. If the wobble persists, inspect the receiver tube for alignment issues. Use an anti-wobble bolt or shim if necessary. For hitch-mounted racks, ensure the rack is fully seated in the hitch and the pin is engaged. If using a trunk rack, verify that straps are tightly secured and evenly adjusted. Regularly inspect the rack for loose hardware and tighten as needed. If wobble continues, consult the product manual or contact Hollywood Racks support for additional solutions. Proper adjustment ensures stability and safety while transporting bikes.
Replacing Damaged or Worn Parts
If any part of your Hollywood Racks bike rack becomes damaged or worn, it is essential to replace it promptly to ensure safety and proper function. Start by identifying the damaged component and referencing the product manual for specific instructions. Contact Hollywood Racks customer support for genuine replacement parts, as using unauthorized components may void the warranty or compromise performance. Before replacing, secure the bikes and rack to prevent movement. Loosen any affected bolts or straps, remove the damaged part, and install the new one following the manufacturer’s guidelines. Tighten all hardware securely and test the rack’s stability before use. Regular inspections can help catch wear early, preventing larger issues.